Language:
English
Language:
English


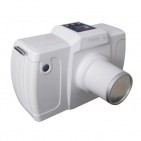
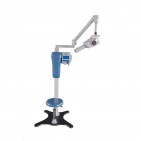
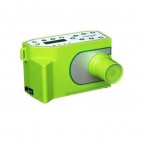
Dental X-Ray Portable Machine BLX-8
Features:
1. The tube head is equipped with excellent radiation-shield protection ,except the radial mouth,and tests have shown that the radial index is zero.
2. Toshiba 0.3mm x 0.3mm micro-focus tube.
3. Digital control machine, x-ray output precision, stability
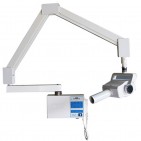
4. No protective operation room is needed when installing the complete machine.
5. Flexible adjustment of position and angle of handpiece,
6. Develop dental film in daylight, no darkroom needed.
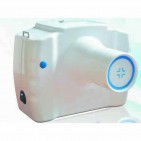
7. Compact in volume, light in weight, convenient for carrying.
8.Time is adjustable, high contrast of picture, imaging in focus.
Technical:
110v±10% and 220V±10% (We stock the item specail for the customer all over the world)
Power: 24V 8000MA Charger: 220V/110V, 50Hz
Tube current: 0.1mA
Rating: 60W
Frequency: 30 KHz
Exposure time: 1-9 seconds optional
Leak radiation: < 20µgy/h(12lb)
Focus Skin Distance: >20cm
Tube voltage: 70KV
Relative Humidity(RH) < 80%
Storage conditions: 5-40 degrees Celsius, relative Humidity
Net weight: 2.5 kg
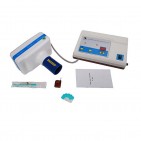
Package With:
1 x Main Unit
1 x Dental Film position
1 x Charger
5 x Dental Films for test
1 x Warranty Card
1 x English Manual
1 x Deluse Packing Box
How to use:
1. Operation of the Main Unit
Upon receiving, open the box and check the product for possible damage during shipping.
Make sure the fittings on the encasement list are packaged within the box.
Install the blue ray tube to the foreside of the ball head, then tighten it.
Turn on the Power, the pilot lamp will be light up.During this time, the digital tube will show the fore setting time. Now the equipment is in standby mode.
Setting the time (Skip to next step if unneeded) Use the "SET","+", and" -" buttons to reset the time as follows: press SET, the pilot lamp above is illuminated, the machine is now in the time setting mode→then press "+" and" -" to set the time needed (time range is 1-9seconds); press set again when the time is adjusted the light lamp is off. The equipment is now in standby mode.
Put the Tooth film plumb behind the tooth which is going to be taken picture, and be as close as possible (the smooth side stick to the tooth)
Keep the ball head plumb to the tooth projection position; Have the ball head, tooth, and tooth film steadily mutually plumb.
After positioning, use the ON/OFF on the main Unit, to take pictures. (Notice: gently press 0.5 sec to turn it on)
After exposure to the tube, press the start button again in case of an emergency to stop shooting and return to standby status. (At this point there was no output ray,so the dental films can be used again).
Repeat step 6 to reset the picturing time.To repeat the picturing process, please repeat steps 7 to 9.
Turn the power off when the work is finished, press POWER, making sure the pilot lamp is off.Don't keep the machine long in standby mode.
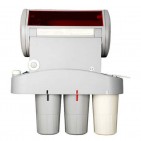
2. Developina the Dental film
Picture the tooth following the right operating procedure of the X-ray Unit,then take the film out from the mouth.
Use a syringe to extract 4-5 mi of imaging liquid.
Transfuse the liquid into the bag, nip both the ends and the sides of the bag with thumbs and first fingers(knead the film).
Open the end of the bag about ten minutes after transfusing the liquid into the bag.
Take the film out, put it into clear water, and rinse it. Don't wipe the surface of the film with the surface to prevent damage to the image.
Observe and diagnose after the film becomes dry.
3. Points for Attention
Make sure the angle of film, tooth, and ball head are properly aligned when taking a picture. Keep them steady until the last step of picturing; making sure that there is no change in any of their positions.
Remember to turn the power 0ffwhen work is done.
Charge the battery if the machine cannot work and the red lamp lignt
After turning the power on, wait one minute before taking pictures, this allows the ray to provide a steady output.
The equipment switches into protection mode automatically when the voltage is incorrect. If this occurs, it will not be able to carry out the normal work of filming.
When taking pictures, the ON/OFF button could stop the objection and then the machine goes back to the preparation mode.
Use high quality tooth film and developing liquid to make clear pictures.
Handle the ball head gently while in use, so as not to damage the delicate component.
We usually set the time between 3-8 seconds when taking pictures, but the actual time of ray output is 0.2-0.5 seconds.
If a situation occurs, preventing the machine from taking regular pictures, contact the seller to solve the problem instead of trying to service the product yourself.
Keep the tooth film and the liquid in a proper place and use them within the shelf-life period.
Development of films should be performed at temperatures ranging between 23-25 degrees Celsius to ensure the image quality.
& Other requests accordance with the scope of the technical parameters.
Write a review
Your Name:Your Review: Note: HTML is not translated!
Rating: Bad Good
Enter the code in the box below: